
Post-processing is an essential step in perfume photography, helping to bring out intricate details, enhance lighting effects, and ensure the overall composition looks polished. However, there is a fine line between refinement and over-processing. When editing perfume bottle photos, it’s crucial to maintain the authenticity of the product while making subtle enhancements that elevate its visual appeal.
Unlike fashion or portrait photography, perfume photography is heavily reliant on materials and textures—glass, liquid, metallic caps, and labels. Over-editing can lead to an artificial appearance, distorting the original character of the bottle. On the other hand, under-processing may leave the image looking dull, failing to capture the luxurious essence of the product.
Key Challenges in Maintaining Authenticity:
- Glass reflections and refractions: Editing should enhance clarity without making the bottle look artificially sharp.
- Liquid color balance: The perfume’s hue should remain true to its real-life shade.
- Brand typography and labels: Retouching should maintain the brand’s identity, ensuring text remains crisp and legible.
- Light manipulation: Enhancing highlights and shadows should emphasize the bottle’s design without making it look unnatural.
The goal of post-processing is not to “fix” a bad shot but to refine and perfect an already well-composed image. With this mindset, let’s explore the tools and techniques essential for achieving professional results.
Essential Tools and Software for Perfume Photo Editing
Before diving into the techniques, having the right tools is crucial. Perfume photography demands precision and control, which means selecting software that offers detailed adjustments rather than broad, automatic filters.
Recommended Software:
- Adobe Photoshop – Industry-standard for detailed retouching, layer adjustments, and high-end refinements.
- Adobe Lightroom – Excellent for color correction, exposure balancing, and batch processing.
- Capture One – Offers superior RAW editing and color grading, particularly for high-end commercial photography.
- Helicon Focus – Useful for focus stacking when capturing ultra-sharp product images.
Essential Editing Tools:
- Adjustment Layers & Masks: Allows for non-destructive editing, ensuring flexibility in refining elements.
- Curves & Levels: Helps fine-tune contrast and highlight details without distorting colors.
- Healing & Clone Tools: Ideal for removing dust, smudges, or unwanted reflections.
- Dodge & Burn: Enhances highlights and shadows to create depth and dimension.
- Selective Color Adjustment: Helps maintain the true color of the liquid and packaging without affecting the entire image.
Why Professional Editing Software Matters
While mobile apps and basic editors can enhance images, high-end perfume photography demands precision. Glass, metal, and liquid textures require layered refinements that only professional tools can provide. Additionally, working with RAW files instead of JPEGs ensures the highest quality adjustments, preserving every subtle nuance in the image.
Understanding Light, Shadows, and Reflections
Lighting plays a crucial role in perfume photography, and post-processing should complement the original lighting setup rather than completely altering it. The interplay of light, reflections, and shadows on glass surfaces creates a sophisticated, high-end look—but improper editing can flatten these effects, making the image lose its natural depth.
The Role of Highlights and Shadows:
- Highlights define the shape and material – Enhancing them subtly adds a luxurious touch.
- Shadows add dimension – A well-balanced shadow ensures the bottle doesn’t look like it’s floating unnaturally.
- Reflections create realism – Over-editing reflections can make a glass bottle look fake.
Techniques for Refining Light and Shadows:
- Using Dodge & Burn:
- Lighten specific areas without losing detail.
- Add controlled shadows for a sense of depth.
- Highlight Recovery in RAW Processing:
- If the bottle appears overexposed, pull back highlights to restore glass details.
- Gradient Masks for Smooth Lighting Transitions:
- Avoid harsh edges by blending shadows naturally.
Managing Unwanted Reflections:
Perfume bottles are highly reflective, often picking up distractions from the surrounding environment. While some reflections enhance realism, others may need strategic retouching.
- Use the Clone Stamp or Healing Brush to remove minor distractions.
- If large reflections distort the bottle’s shape, use frequency separation techniques for advanced retouching.
- Always check reflections on metallic caps—over-processing can make them look like solid plastic rather than polished metal.
Subtle refinements in light, shadow, and reflection create a luxurious, premium aesthetic without compromising the integrity of the product.
Color Correction: Preserving True Hues of Perfume Bottles
One of the most challenging aspects of perfume photography is maintaining accurate colors, especially when dealing with tinted liquids, colored glass, and metallic elements. Camera sensors often misinterpret the true hue of perfume, resulting in shifts that make the product appear different from its real-life counterpart.
Why Color Accuracy Matters:
- Customers expect the perfume bottle to look the same as in marketing materials.
- Inconsistent color across images can weaken brand identity.
- Incorrect hue shifts can make the perfume appear lower quality than it is.
Techniques for Precise Color Correction:
- White Balance Adjustments:
- Use a neutral gray reference in RAW editing to set an accurate base.
- Avoid over-warming or over-cooling the image—keep it true to the original scene.
- Selective Color Grading:
- In Photoshop, use the Selective Color tool to fine-tune specific tones without affecting the entire image.
- Adjust reds and yellows carefully to prevent liquid tones from becoming oversaturated.
- Color Matching Across a Series:
- If you’re shooting a collection, ensure uniform color correction across all images.
- Create a custom Lightroom preset to maintain consistency.
Preserving the True Tone of Liquid:
Perfume liquid is a defining element of the product’s identity. Some perfumes are golden amber, while others are soft pink or deep blue. Over-editing can make these shades appear neon or unnatural.
- Avoid increasing saturation excessively—enhance vibrancy subtly.
- Use Hue/Saturation layers to fine-tune specific color channels.
- Ensure the liquid maintains depth and transparency by balancing highlights and midtones.
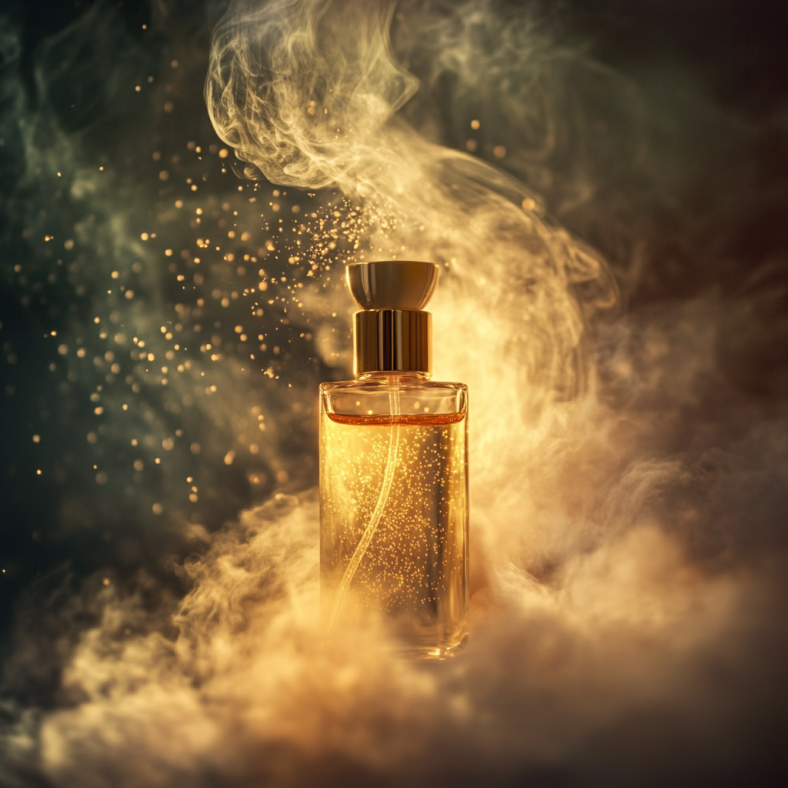
Enhancing Glass and Transparency Without Overprocessing
Glass is one of the most challenging materials to edit in photography. Its reflective nature, transparency, and interaction with light require careful handling to avoid an artificial look. When photographing perfume bottles, maintaining the clarity of the glass while enhancing its depth is key to achieving a luxurious, high-end aesthetic.
Unlike matte surfaces, glass relies on subtle reflections and refractions to convey its presence. Over-editing can lead to a plastic-like effect, while under-editing can make the bottle appear flat and unremarkable.
Key Techniques for Enhancing Glass
Adjusting Clarity Without Over-Sharpening
Glass edges should be crisp and well-defined without looking overly processed. The best approach is:
- Use the Clarity tool in Lightroom or Photoshop’s Camera Raw filter to add subtle definition.
- Avoid aggressive Sharpening filters, as they can introduce unnatural artifacts.
- Apply High Pass sharpening selectively to key edges while masking out smooth areas.
Balancing Transparency and Reflections
A well-edited perfume bottle should showcase both transparency and surface reflections without overemphasizing either.
- Use Curves adjustments to fine-tune contrast, ensuring the bottle doesn’t appear washed out.
- Adjust opacity selectively on reflection layers if working with multiple exposures.
- If unwanted reflections distract from the product, remove them with the Clone Stamp Tool or Frequency Separation method for seamless retouching.
By keeping reflections controlled but not eliminated, the glass maintains its premium aesthetic without looking artificial.
Retouching Labels and Typography: Sharpness vs. Natural Look
The label on a perfume bottle is just as important as the bottle itself. High-end brands use luxurious typography, embossed elements, and fine print to enhance their visual appeal. Post-processing should preserve these details without making the text look too digitally enhanced.
Common Challenges in Retouching Labels
- Blurred or distorted text due to reflections or glass curvature.
- Over-sharpening leading to pixelation or unnatural edges.
- Color inconsistencies between the label and the rest of the bottle.
How to Achieve a Natural Yet Sharp Label Look
Enhancing Text Without Overprocessing
- Use the Unsharp Mask filter in Photoshop to add controlled sharpness without making text appear jagged.
- If the label appears faded, apply a Selective Curves adjustment to boost contrast in the text without affecting the entire bottle.
- Use Dodge & Burn to enhance light and shadows around embossed letters subtly.
Fixing Perspective and Curvature Issues
- If the bottle’s curvature distorts the label, use Warp or Liquify tools in Photoshop to correct perspective.
- When dealing with reflective surfaces, create a separate layer for the label and adjust contrast separately from the glass.
Maintaining a crisp yet authentic-looking label ensures that branding remains strong without an unnatural digital finish.
Background Refinement: Achieving Elegance Without Distraction
The background in perfume photography should complement the product rather than compete with it. Whether using a seamless backdrop, a textured surface, or a creative scene, post-processing helps refine the background for a more polished final image.
How to Refine the Background Without Losing Realism
Cleaning Up Imperfections
- Use the Spot Healing Brush or Clone Stamp Tool to remove unwanted dust, scratches, or blemishes.
- If working with a paper or fabric background, apply a light Gaussian Blur to soften unwanted texture noise.
Enhancing Depth with Selective Blurring
- Use Photoshop’s Lens Blur tool to create a gradual blur effect, mimicking depth of field.
- Apply a Gradient Mask to ensure the transition between the focused and blurred areas looks natural.
Adjusting Colors to Complement the Perfume Bottle
- If the background color is too harsh, use Selective Color adjustments to tone it down without affecting the product.
- When working with a black or dark background, enhance subtle tonal variations to prevent it from looking too flat.
A well-balanced background keeps the focus on the perfume bottle while adding sophistication to the composition.
The Role of Texture and Depth in High-End Perfume Photography
Texture plays a vital role in perfume photography, influencing how light interacts with different surfaces. From smooth glass to metallic caps and paper labels, maintaining authentic textures ensures the final image looks refined rather than artificial.
How to Preserve Texture While Enhancing Depth
Avoiding Over-Smoothing
- Use Frequency Separation to clean up textures without eliminating natural details.
- Instead of blurring, use Noise Reduction tools selectively to avoid a plastic-like effect.
Enhancing Depth with Controlled Highlights
- Apply Dodge & Burn on separate layers to emphasize the bottle’s curves and edges.
- Use a Gradient Overlay to enhance the natural falloff of light without creating a fake “spotlight” effect.
Bringing Out Material Details
- For metallic caps, use Curves adjustments to refine highlights and maintain a polished yet realistic finish.
- For labels with embossed textures, enhance shadows slightly to give a three-dimensional appearance.
A well-balanced approach to texture and depth makes the perfume bottle appear luxurious, tangible, and visually engaging.
Final Touches: Exporting for Web, Print, and Social Media
Once editing is complete, the final step is exporting the image in the correct format for different platforms. An image optimized for Instagram will have different requirements than one intended for a high-quality print advertisement.
Best Practices for Exporting Perfume Photography
Optimizing for Social Media
- Resize images to 1080x1350px for Instagram to maximize detail.
- Save as JPEG at 80-90% quality to balance clarity and file size.
- Convert to sRGB color space to ensure accurate color display across devices.
Preparing for Print
- Export at 300 DPI resolution for high-quality prints.
- Use TIFF format instead of JPEG to avoid compression artifacts.
- Convert to CMYK if printing professionally to ensure color accuracy.
Ensuring Consistency Across Platforms
- Create a set of presets for different platforms to maintain a uniform look.
- Check color accuracy by comparing images across multiple screens before publishing.
By tailoring export settings to the intended platform, the final image maintains its quality and impact, whether viewed online or in print.
Questions & Answers
A: Avoid excessive sharpening and instead use subtle Clarity adjustments, High Pass filtering, and Dodge & Burn to refine edges naturally.
A: Use Clone Stamp and Frequency Separation techniques to remove distractions while preserving the bottle’s natural reflective properties.
A: Use Selective Sharpening with the Unsharp Mask filter, enhance contrast with Curves, and correct perspective distortions with Warp or Liquify tools.